Rating Vendors
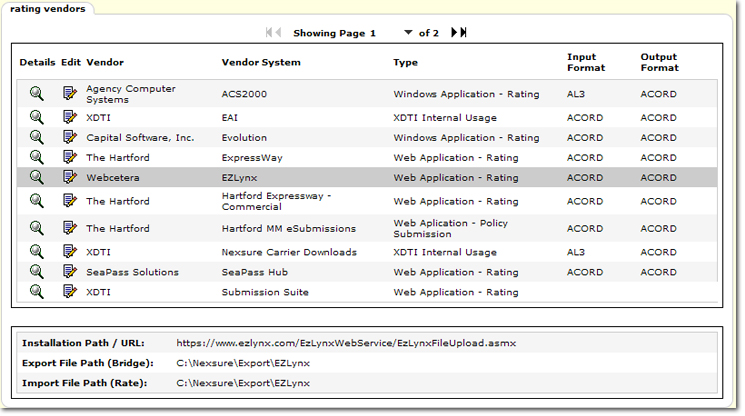
The rating vendors tab will list the vendors that Nexsure has the option of rating with, the system that the vendor uses, the type (data transfer that is being used), the input format and the output format. To transfer Nexsure data for rating quotes and to bridge data from vendors into Nexsure, valid vendor account and login information is sometimes necessary. By default vendor information is added in the Rating Vendors link in the Nexsure Setup Console.
Important: Nexsure automatically sets up all information on the rating vendors tab, alterations to any of this information may result in a disconnection from the rating process.
To Set Up Rating Vendors
- On the Utility menu, click SETUP. The Setup Console is displayed.
- In the Setup Console, click Downloads > Rating Vendors. The rating vendors tab is displayed. The rating vendors tab lists the vendors that Nexsure has the option of rating with, the system that the vendor uses, the type (data transfer that is being used), the Input format and the output format.
- On the rating vendors tab, click the Magnifying Glass
 icon to view the details of the vendor. The details are displayed at the bottom of the screen.
- If information for the vendor must be changed, click the Details
 icon to open the vendor dialog box. The user and agency tabs are displayed.
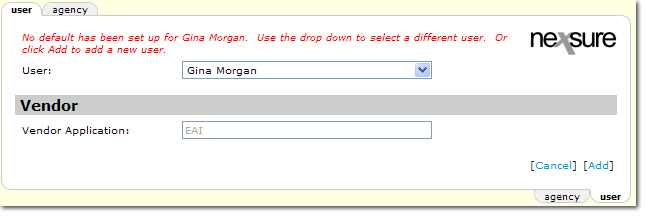
- To set up a new user, click [Add]. The user tab will expand to show fields for entry of user specific information.

- In the Add User list, select the Nexsure user to set up with rating functions.
- In the Vendor Application Details area, click the Ellipsis
 button to navigate to the appropriate paths.
Note: When adding a new user, path information below to be entered, can be copied from the paths already in use on the agency tab.
- Installation Path / URL: Enter the vendor's web site address or navigate to the path to the vendor.
Important: This path or URL should only be changed upon request from the vendor. Alterations to this path without notification from the vendor may disconnect the rating process.
- Export File Path (Bridge): Click the Ellipsis button to navigate to the folder to which the quote will be sent.
Tip: If the Bridge or Rate file paths ever need to be changed within the agency, be sure to communicate the new paths to the employees so that all are aware of where the files have been moved.
- Import File Path (Rate): Click the Ellipsis button to navigate to the folder from which the rating file will be sent to the vendor.
- In the System Login area, enter the following login information:
- Login: Enter the login supplied by the vendor.
- Password / Reenter the Password: Enter a new password for access to the vendor.
- Account Number: Enter the account number from the vendor.
- Department ID: Optional information to be added by the agency.
- Once all user information has been entered, click [Save]. The new user / vendor association has been made. The vendors are then available for rating.
- To set up the agency to work with the vendor, click the agency tab. The Vendor Application Details can be added here just as when adding a user. See step 7 above.
Rating Integration
Rating